This shop has been compensated by Collective Bias, Inc. and its advertiser. All opinions are mine alone. #nothinglikeahug #CollectiveBias
I am STOKED to bring you today’s tutorial because I am a big fan of up cycling and saving money when possible. Plus organization is basically my love language, so when I get to combine the two, I am one happy gal! But I do have some ground rules.
- My rules with up cycling are the time and cost to up cycle said item cannot be greater than what it would cost me to just go and buy it. You know the kind I am talking about, some “hack” that uses 95 bottles of nail polish instead of buying a plastic bowl.
- It must be something I will actually use and would replace something I need to buy. I hate junk and clutter, I thought the whole point of up cycling was to get rid of items you no longer need or use.
With 3 kids age 3 and under I am swimming in diaper boxes and so this tutorial is my favorite because it took something I (and every other mom in America) have an abundance of and made it into something I need more of. Darling storage bins.
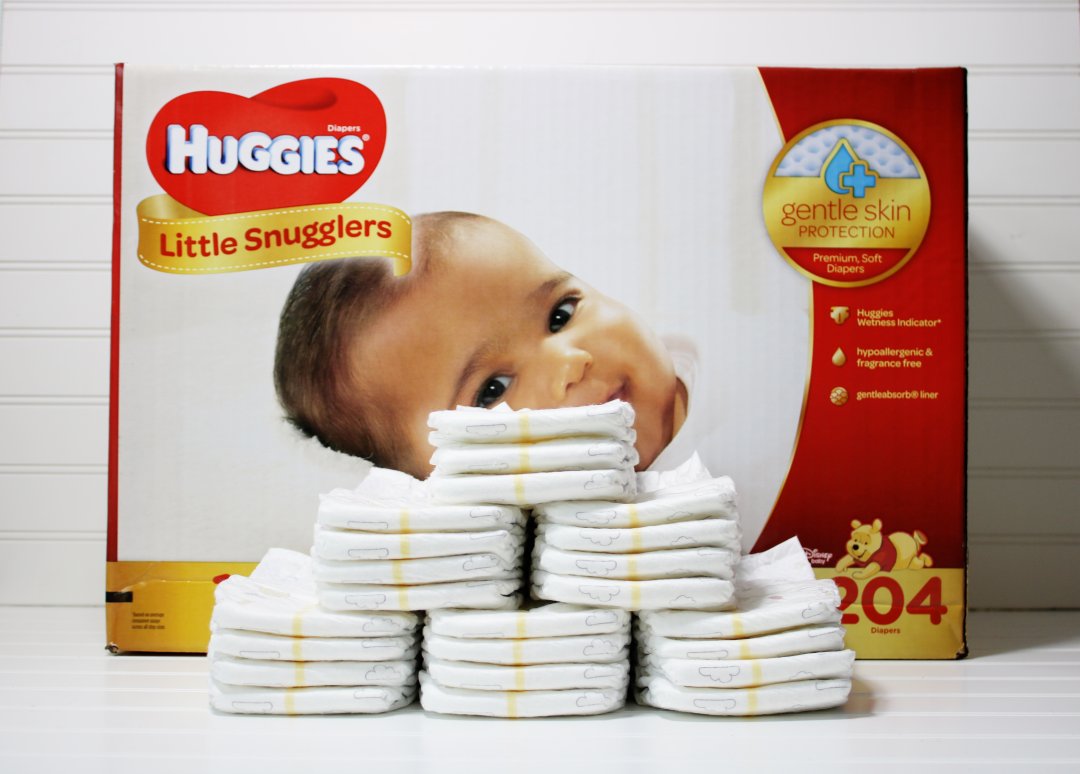
First off, you will need to get Huggies® Diapers. I say Huggies® because they are my favorite diapers for my kids. For newborns I love the cut out for the umbilical cord and for the older kids they are hands down the very best diapers to get through the night time and my “heavy wetters”.
You can get Huggies® diapers in bulk at Sam’s Club for the best price around! All you have to do is click this image and you can shop right from here!
DIY Storage Boxes
Okay, now the easiest DIY storage ever. It is easy and you can make several in half the time it would take you to run to the store to pick some up.
What You Will Need
- Huggies® Diaper Box (you can also use Huggies® Wipes)
- High Quality Wrapping Paper to Fit Your Esthetic/Decor
- White Paper (optional)
- Glue
- Box cutters or a sharp knife to cut the box (optional)
First you will measure your shelving or area you want to store them in.
Measure the boxes and mark them according to your shelving measurements.
Use box cutter and cut the boxes along the marks you made.
I covered some of mine with white paper so that they don’t show through. Totally optional and depends on the paper you use. The pink paper I used did not need the extra lining.
Wrap the boxes with the paper like you would a present! It’s so easy and you can use glue, tape or hot glue.
Print out chalkboard labels you can use!
Now that you have your tutorial to make storage out of all of those diaper boxes you will go through over the course of your babies life, it’s time to get serious about saving money on them. Make sure you stock up and save on the best brand around with Huggies® Diapers and Sam’s Club!
What is your favorite thing to up-cycle?
XO~ Melissa

I made a few similar boxes two years ago, and I have been amazed at how well that they have held up! #client
I love this idea- cute, useful and almost free! I can think of 5 places right now I could use one of these boxes.
You could make labels for them too!